Securing a horse onto a Rescue Glide
A non-ambulatory horse must be secured before loading into a rescue trailer or horse ambulance. The most practical means of accomplishing this task is to secure the horse onto a Rescue Glide. Here are the procedures that we use.
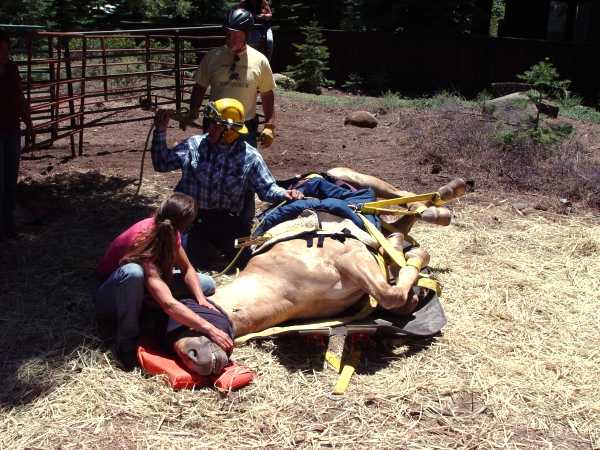
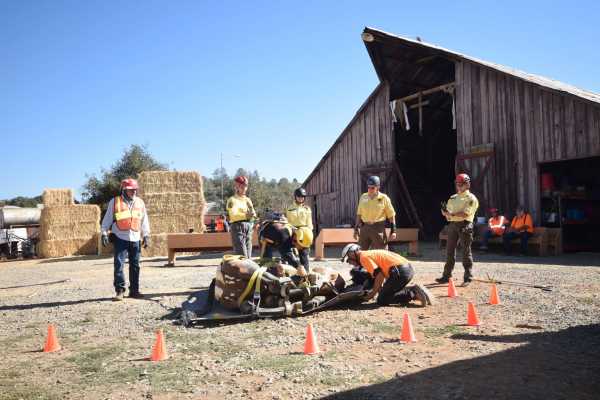
1. Control the head and hobble the horse.
Flailing legs and hooves can present critical safety issues. Typically the horse's head should be controlled and the horse should be hobbled as soon as possible before other activities take place
Getting control of the "moving parts" is a critical first step.
2. Position the horse on the Rescue Glide.
A sideways drag or log roll are often the most practical and effective ways to position the horse correctly on the Rescue Glide. A life vest or similarly padded device is placed under the horse's head to protect its down side eye. Note: If the horse has been laying on one side for a significant amount of time and it would not be injurious to the horse to roll it over, rolling it onto the Rescue Glide so that the opposite side is now carrying the weight of the horse's body is the more appropriate protocol.
Rolling a horse onto the Rescue Glide "restarts the clock" for downed horses.
The head and hobbles can then be secured to the Glide.
(The webbing attached to the hobbles may be secured before or after the ratchet straps, depending on the situation.)
You can use a small ratchet strap, webbing or a pulley system to secure the hobbles. Choose the most practical option to control over how tight the horse's legs are drawn in. If a pulley is used, some padding should be placed between the pulley rope and the horse. If using webbing, utilize a long piece of doubled webbing drawn from the hobbles, through a side hole of the Rescue Glide and then back through the hobble ring to provide sufficient mechanical advantage to properly secure the legs.
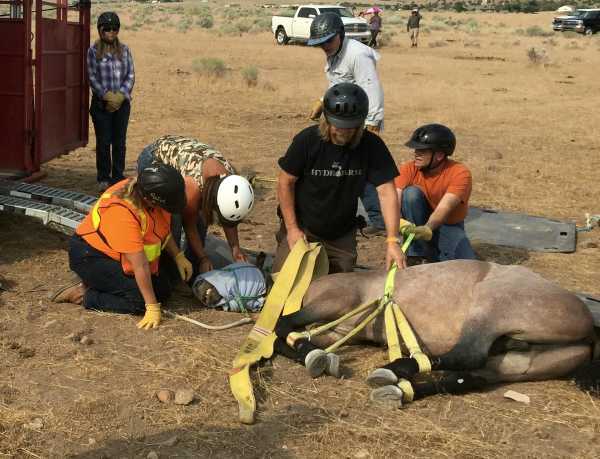
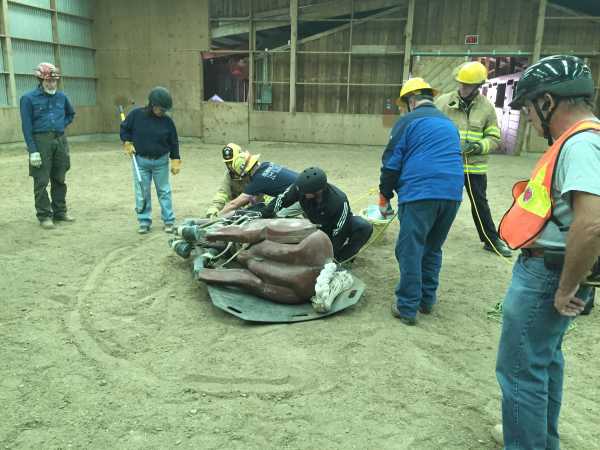
3. Attach the ratchet straps.
Working from the back side of the horse, attach a strap to chokers attached to the Rescue Glide. Insert padding between the strap and the horse, then bring the strap across the horse. (In this case we used old shipping boots for padding.) Depending on the size of the horse, its injuries and its position on the Rescue Glide, the ratchet straps may be configured in parallel or "criss-cross." When placing straps in parallel, start with the forward strap. When "criss-crossing," be sure that the configuration does not impede normal breathing.
(The chokers are looped through the openings in the Rescue Glide and provide for more flexibility if the horse struggles, reducing the chances of the ratchet straps coming loose.)
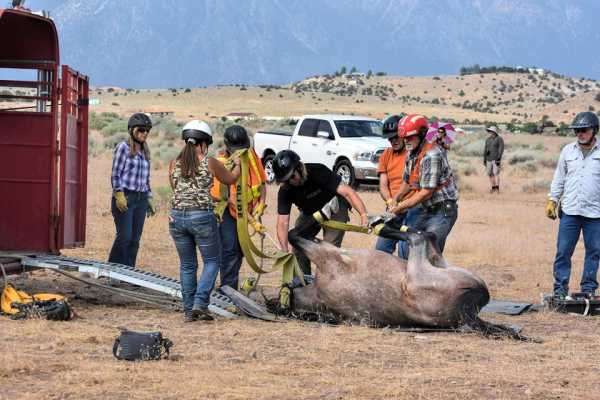
Attaching ratchet straps from the dorsal side of the horse.
The chokers provide a more secure grip for the ratchet straps when securing a large animal.
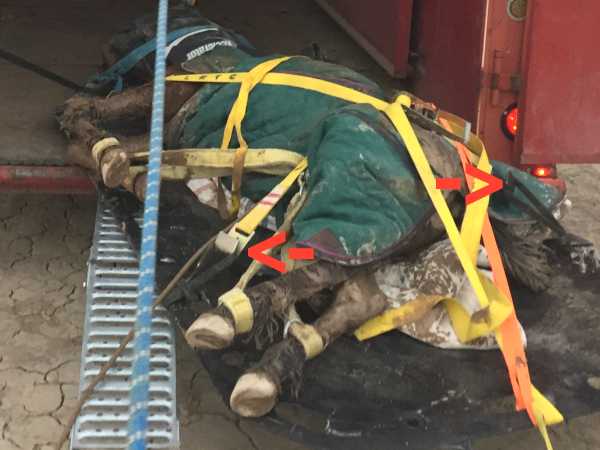
After securing the horse with straps, check hobble tension and head tie-down and adjust as necessary.
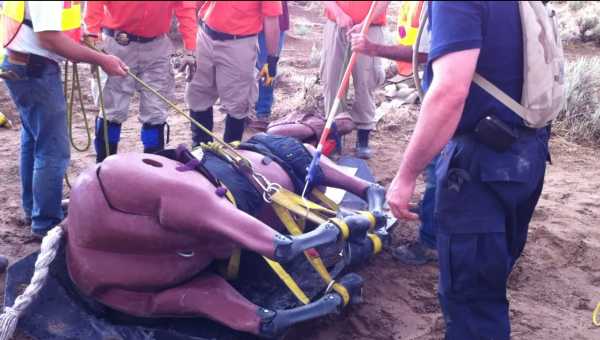
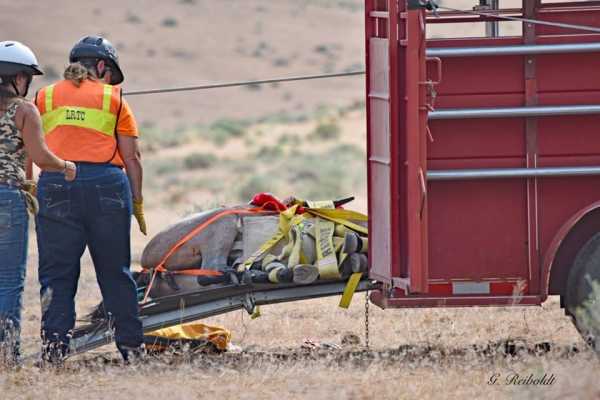
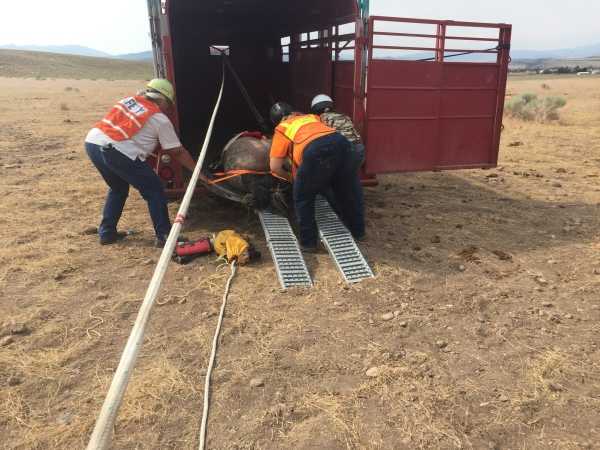
4. Prepare to move the horse on the Rescue Glide.
Attach haul ropes to the tug ring at the forward end of the Rescue Glide to drag the horse to the rescue trailer. Check all straps securing the horse for proper tension before initiating the haul. Use slip sheets when warranted to reduce friction and wear on the bottom of the Rescue Glide. Vector the load bearing rope as needed to center the glide to the trailer opening.

5. Secure the horse from slipping backwards.
If there will be any uphill movement in the removal of the horse, some webbing or other strap material should be drawn over the rear of the horse and secured in a manner that will prevent the horse from slipping backward on the glide. The configuration and amount of material used would be dependent upon the size of the horse, its position on the Rescue Glide and degree of slope in which the Rescue Glide will be dragged.
Key points.
- Everyone needs to work in a coordinated manner.
- Even a sedated horse can be dangerous while being secured.
- Stay well clear of the horse's hooves. Even with that repeated warnings, people unfamiliar with the "kill zones" end up getting smacked in their ankles which is very painful and could involve fractures.
- When using ratchet straps in parallel, secure the forward strap first. Release the forward strap last. If the horse reacts and tries to get up, it will start with its head. If the horse manages to sit up while still strapped to the Rescue Glide at its abdomen, all sorts of bad things are possible.
- Any time any one reaches over or lays over the horse for any length of time, that person must be tethered to someone on firm ground. Tethering does not mean that the two are tied together. It means that some mechanism is in place where the second rescuer can pull the first rescuer out of danger if the first rescuer slips or the horse reacts. Wearing a safety harness is the most appropriate protocol.
- Constantly check your work. As some straps are tightened, other straps may work loose.
- Do a final check of everything before moving the Rescue Glide.
- Monitor the horse and strapping while dragging the glide to make sure nothing snags or comes loose.
For information on appropriate "load and go" rescue systems, please visit the Rope Rescue Systems information sheet.
The Rescue Glide and its associated accessories are manufactured by
Care for Disabled Animals (CDA), located in Potter Valley, California.
|