|
Competence in forming basic knots is mission critical for both safety and successful performance. Knots need to be easy to tie. They must not slip under a load or come apart when bounced around unloaded. They also need to be easy to untie after ropes and webbing have been placed under loads. Ropes are also weaker when bent into knots, so proper knots will usually have a minimum impact on breaking strength.
The more commonly used knots are described below.
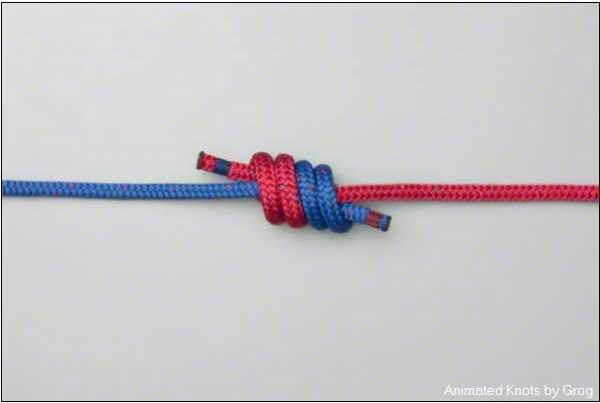
WATER KNOT
The water knot is used to tie the ends of webbing together to form a loop. A water knot is actually stronger than stitching webbing together to form what we used to call "endless belts." Two colors are used in the illustration below to make the knot more understandable.
Basically, one end is tied in an overhand knot, making sure not to have twists in the knot. The other end traces the overhand knot to complete the water knot. It's generally better to leave more rather than less tail out the ends of the knot.
Click the image below to view an animation on how to tie this knot, courtesy of Animated Knots by Grog. The animation will open in a new tab.
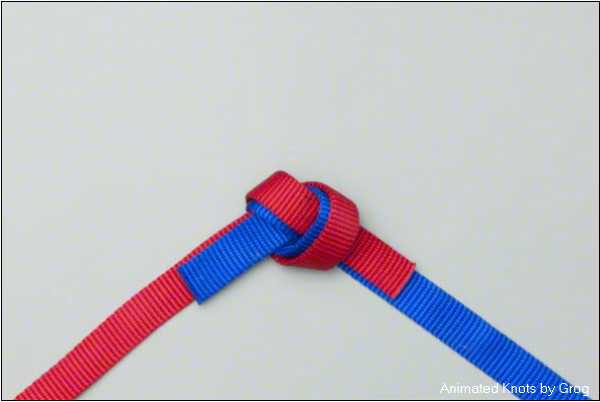
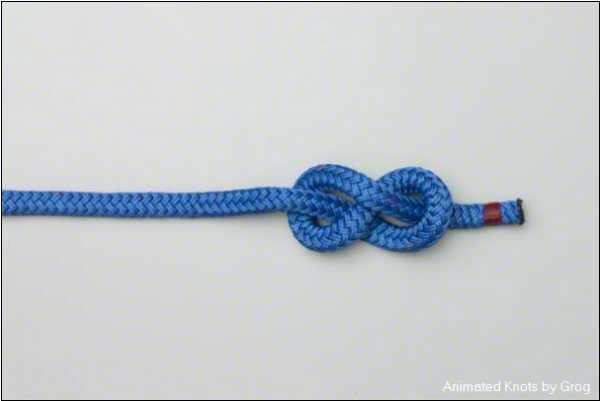
FIGURE 8 KNOTS
All knots, due to their tight bends, can reduce the load bearing characteristics of any rope. Therefore it is important to use knots that are relatively easy to tie and that tend to distribute the load on the rope more evenly throughout the knot. Also, knots need to be able to be easily untied after being loaded, particularly critical in "load and go" situations.
Nearly all of our "load and go" knot applications are based on the figure 8 concept. If you can master a figure 8 you should have no trouble with any of these knots. The more common variations that we use are illustrated below.
(Basic) FIGURE 8 KNOT
The basic figure 8 is typically used as a "stopper knot" to prevent a rope from slipping all the way through a gear bag opening, pulley or other small opening. It can also be placed on the running end as a "back up" to a critical load bearing knot.
Click the image below to view an animation on how to tie this knot, courtesy of Animated Knots by Grog. The animation will open in a new tab.
DIRECTIONAL FIGURE 8 KNOT
The directional figure 8 knot is basically a figure 8 knot formed with the rope doubled over. It can be placed at the end of the rope or in-line as a point of attachment. When used in-line, the loop needs to face in the direction of the load. When tying the knot, the loop will end up facing the opposite direction than it faced when starting the knot. If you find you've tied it backwards, sometimes the easiest solution is to untie the knot, then retie it while standing on the opposite side of the rope.
Click the image below to view an animation on how to tie this knot, courtesy of Animated Knots by Grog. The animation will open in a new tab.
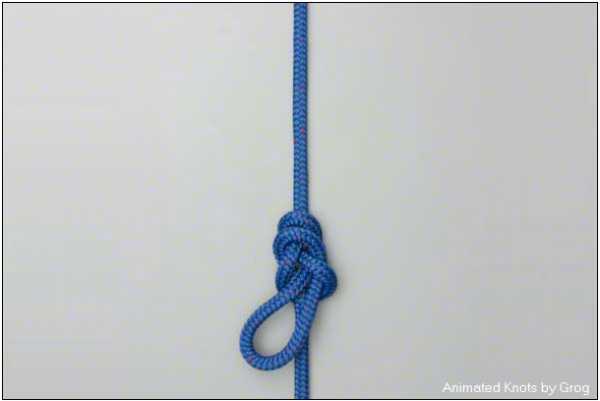
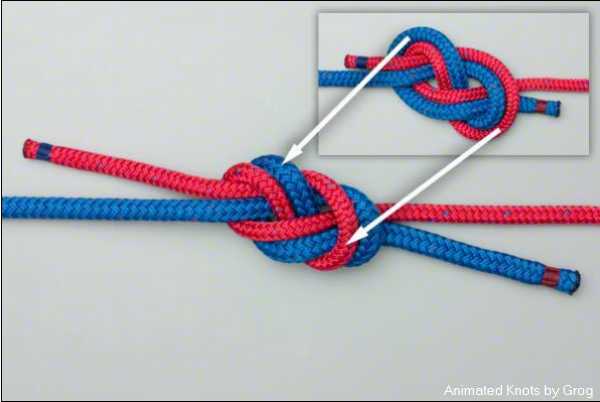
FIGURE 8 BEND
The figure 8 bend is a proper way to join two ropes of relevantly equal diameter. It basically consists of a loosely formed basic figure 8 where the second rope follows the first figure eight in the opposite direction. Once formed the knot is dressed by putting tension on the running ends. For critical loads, the ends could be left longer and stopper knots tied.
Click the image below to view an animation on how to tie this knot, courtesy of Animated Knots by Grog. The animation will open in a new tab.
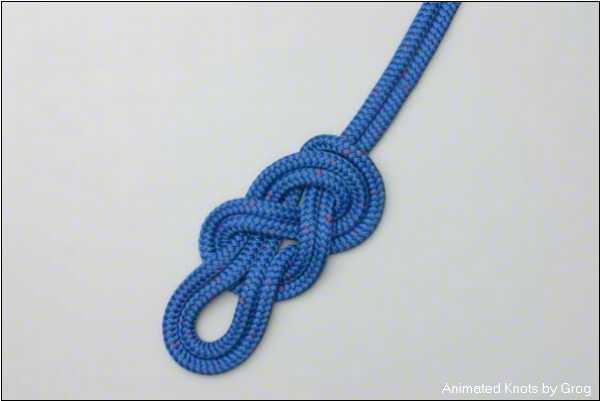
DOUBLE FIGURE 8 LOOP
Sometimes called "bunny ears" the double figure 8 loop ends in two bights (loops) that can either be used to double the strength of an anchor point or be separated provide two points of attachment for loads being applied.
Click the image below to view an animation on how to tie this knot, courtesy of Animated Knots by Grog. The animation will open in a new tab.
PRUSIK KNOT
The Prusik knot, sometimes called the triple sliding hitch, is a sliding knot used with Prusik loops that will usually grip fast when under a load. It can be used when Prusik loops are desired for handholds when pulling on lines and as brakes and safety controls on loaded lines. They will only grip when loaded and will slide when not under a load.
Click the image below to view an animation on how to tie this knot, courtesy of Animated Knots by Grog. The animation will open in a new tab.
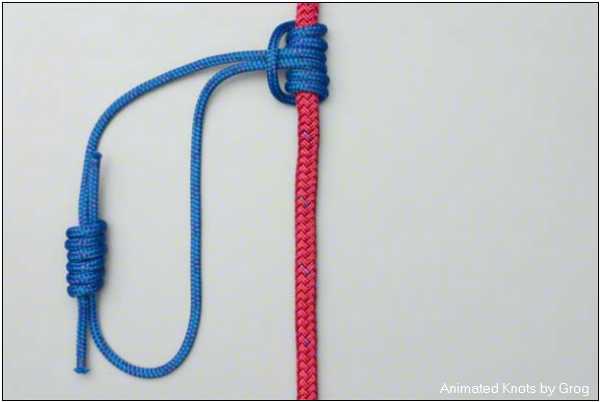
DOUBLE FISHERMAN'S BEND
If you ever have to re-tie a Prusik loop, the correct knot to use is the double fisherman's bend, also called barrel knot. (Sometimes a triple fisherman's bend will be used which involves one extra loop on each side. The basic knot is the same.)
Click the image below to view an animation on how to tie this knot, courtesy of Animated Knots by Grog. The animation will open in a new tab.
|